Android SMS Setup
Learn how to connect your Android phone to your SMS provider so you can send and receive SMS text messages right inside your CRM. Your phone becomes the gateway, so messages go out from your own number using your existing cell plan.
The SMS Sync app turns your Android phone into a personal SMS gateway. Every message you send from CRM is relayed through your phone's SIM, and every reply is synced straight back into your CRM conversations.
What You Need Before Starting
Make sure you have these ready before you begin:
- ✅ An Android phone with an active SIM and a working cell/SMS plan
- ✅ The phone plugged into power (so it can run the app 24/7)
Part 1: Connect Your CRM & Install the Marketplace App
Before touching your phone, connect your CRM and install the marketplace app so SMS appears as a channel in your sub-account.
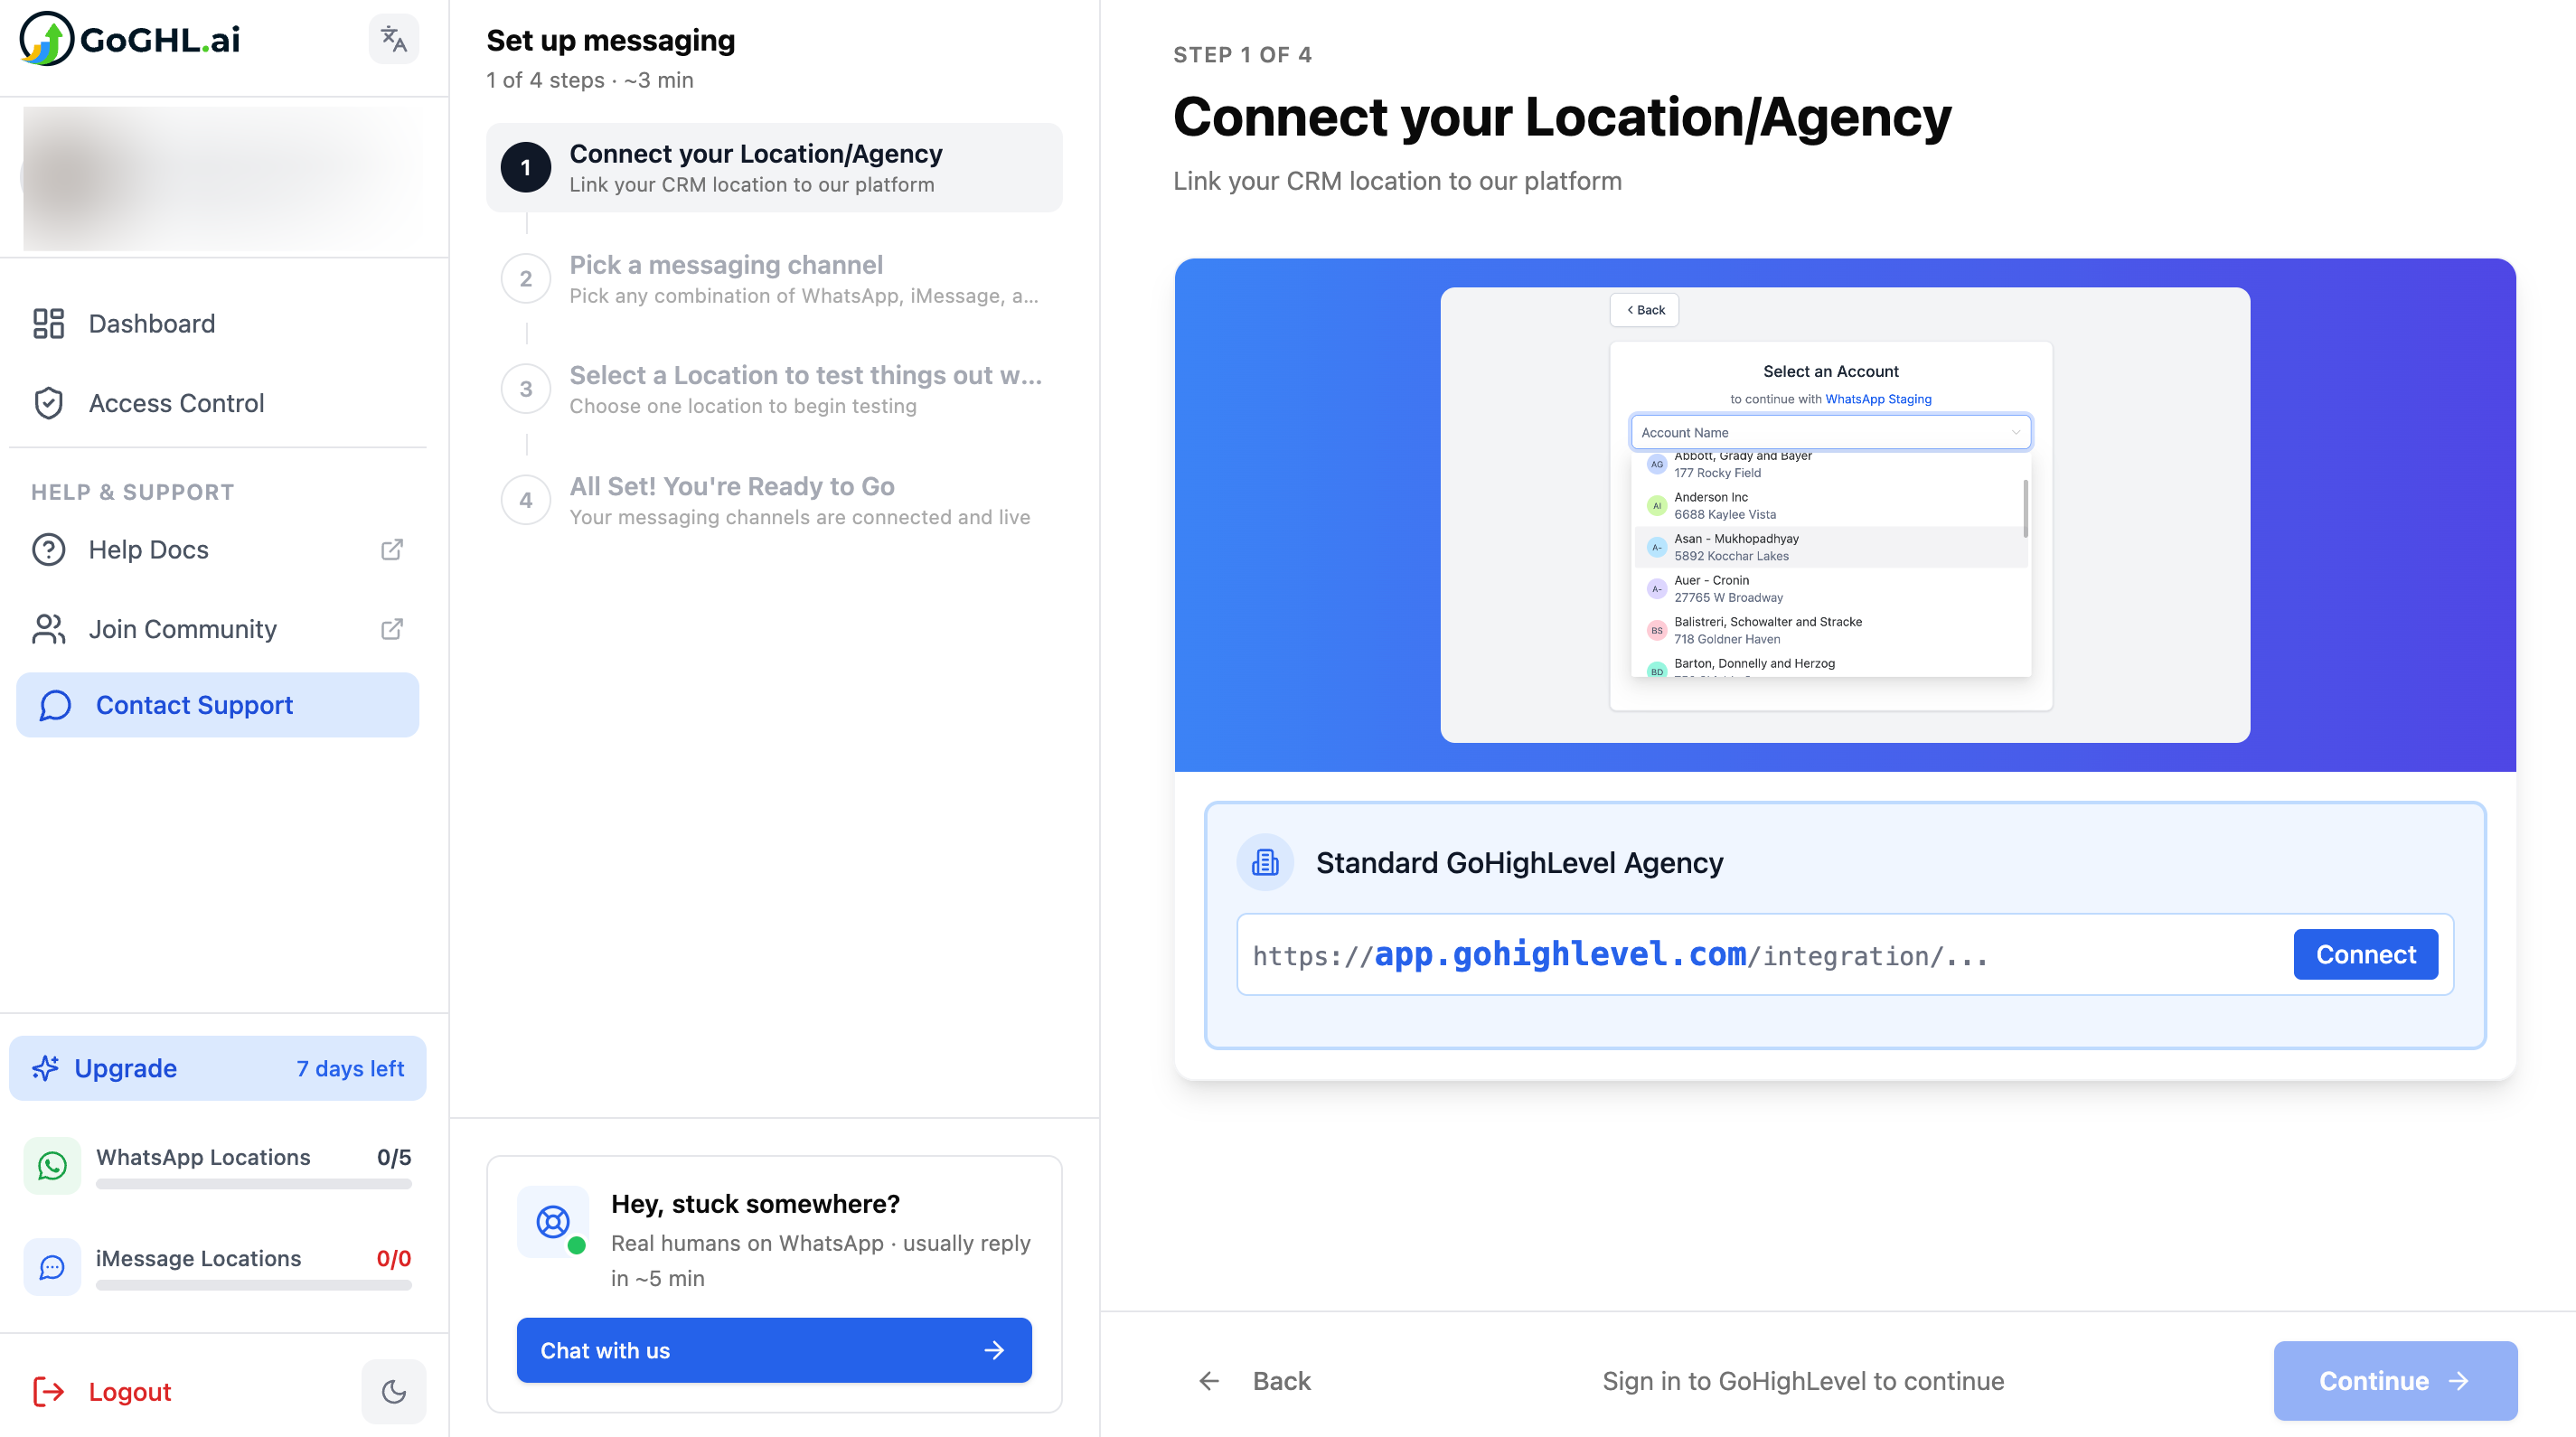
Step 1: Connect Your CRM
- Visit your SMS provider dashboard and log in (or create your account).
- Go to your dashboard and click the Connect button.
Step 2: Install the Marketplace App
Install the marketplace app on your sub-accounts. If you're an agency user, choose Install under all locations and enable automatic installation for future locations. Connect each sub-account individually.

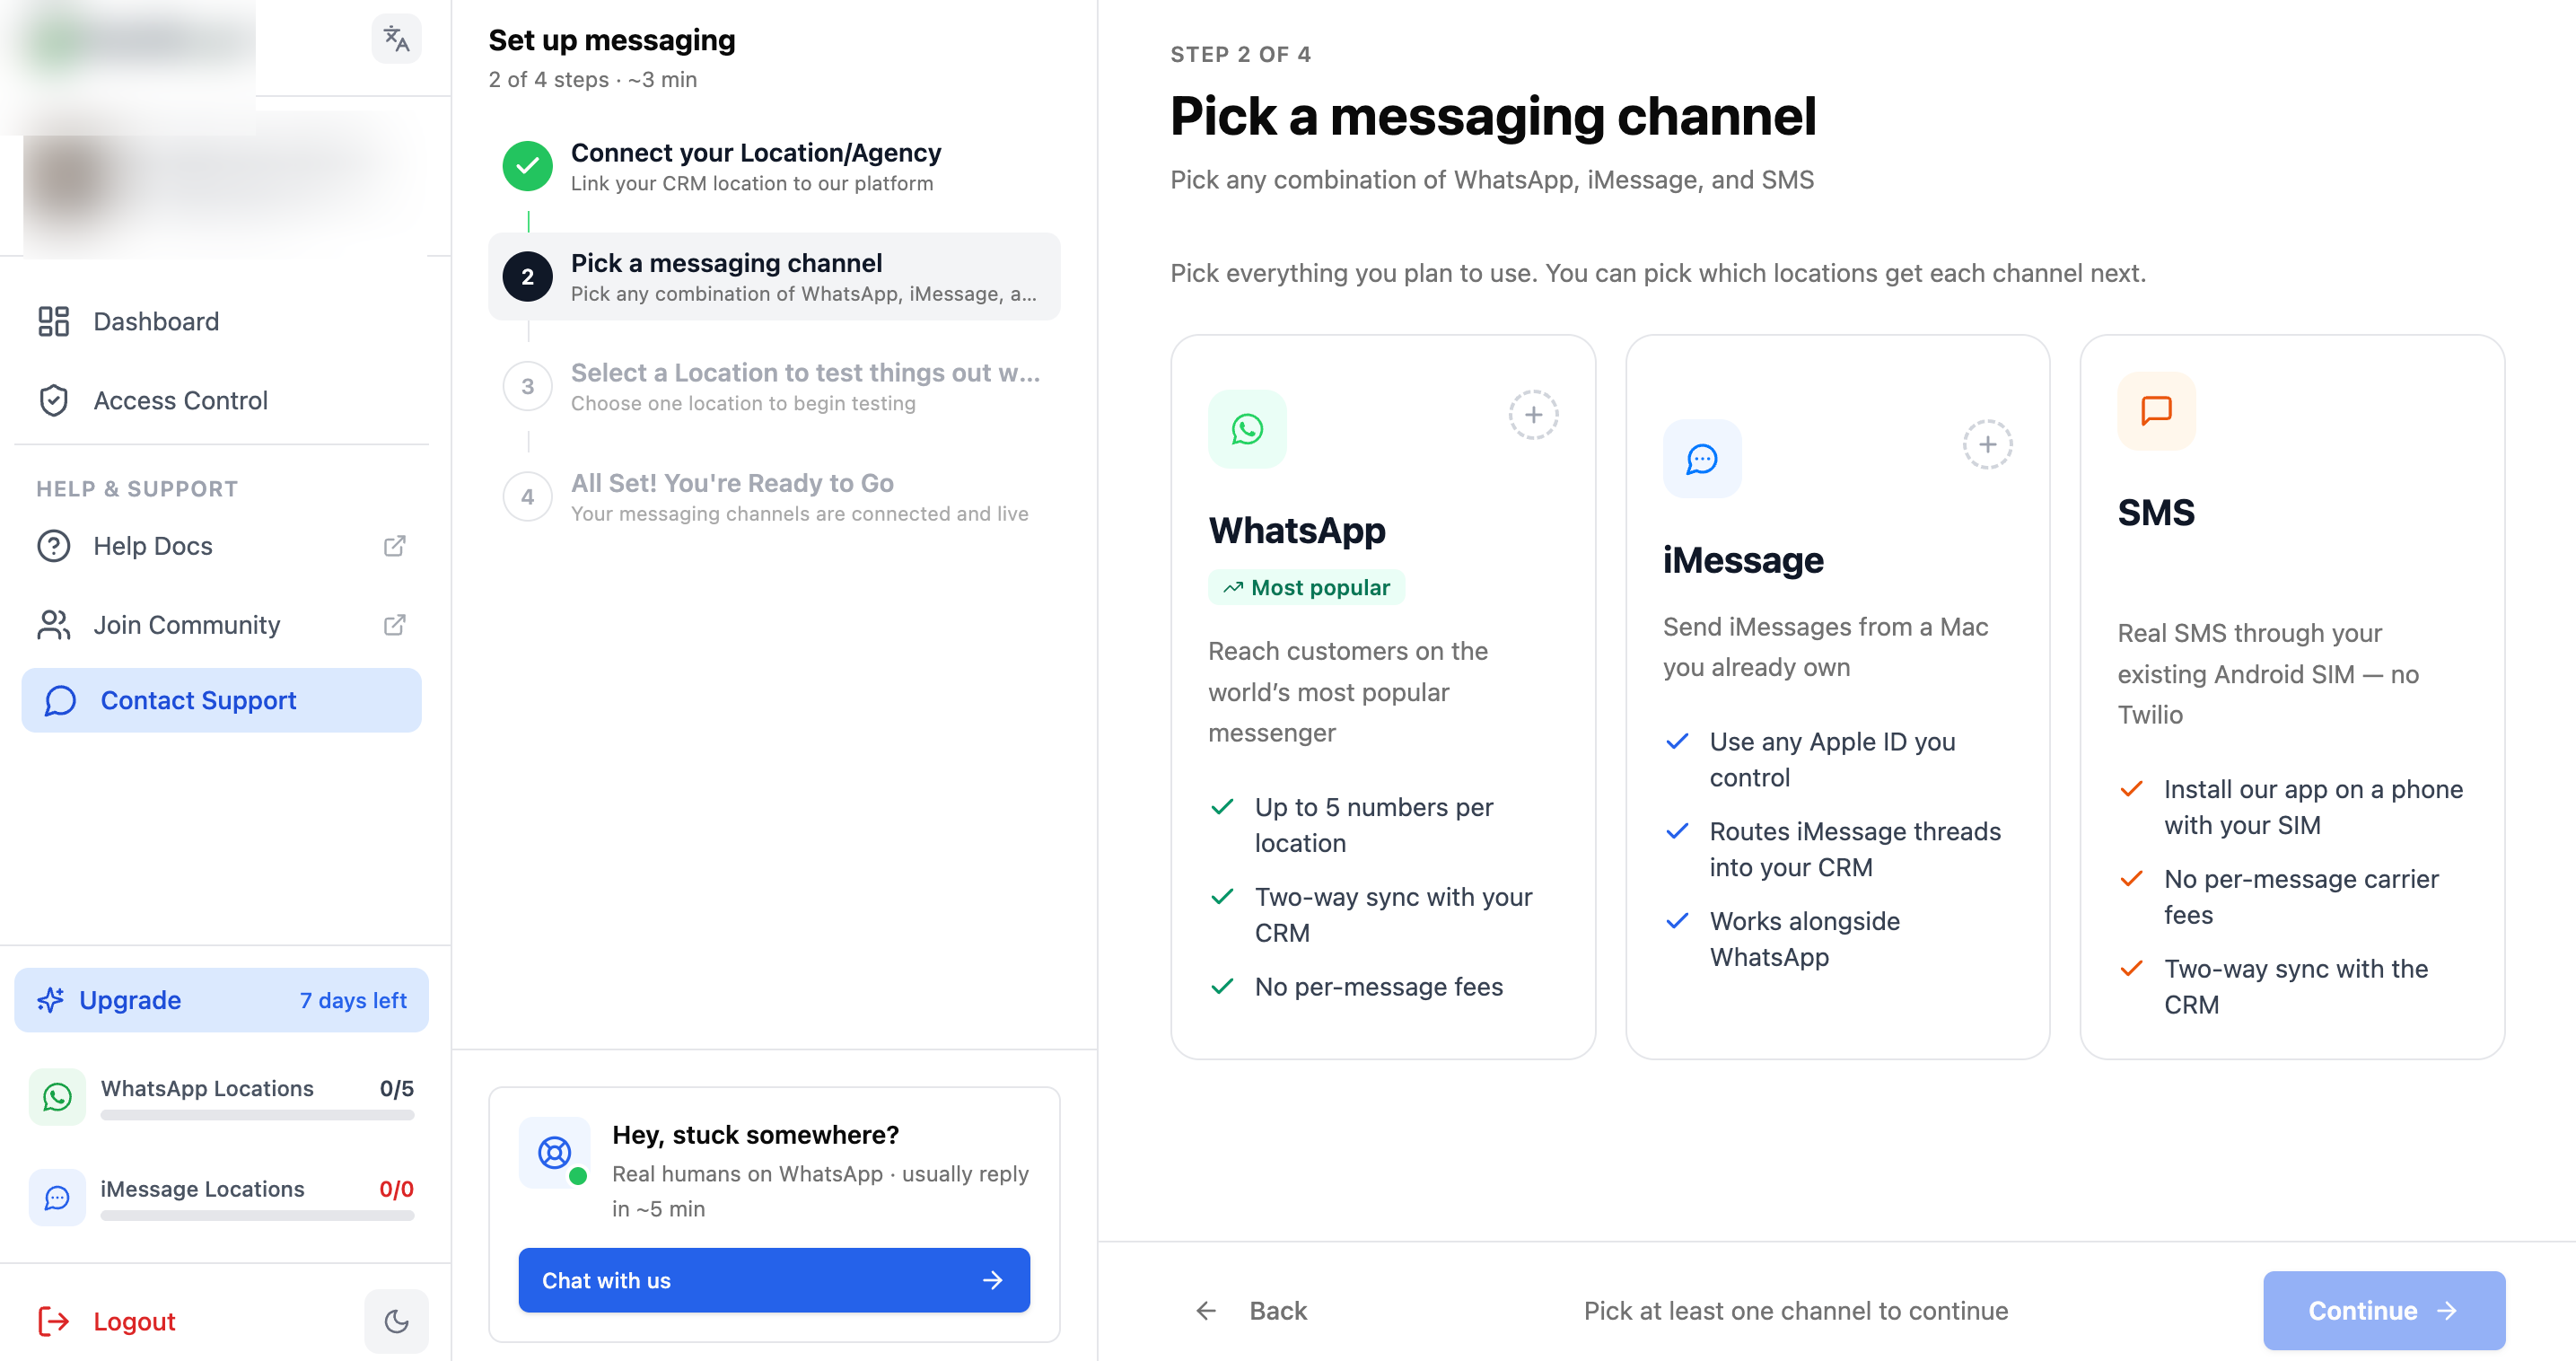
Step 3: Pick an SMS channel
Step 4: Select the sub-account you want to connect

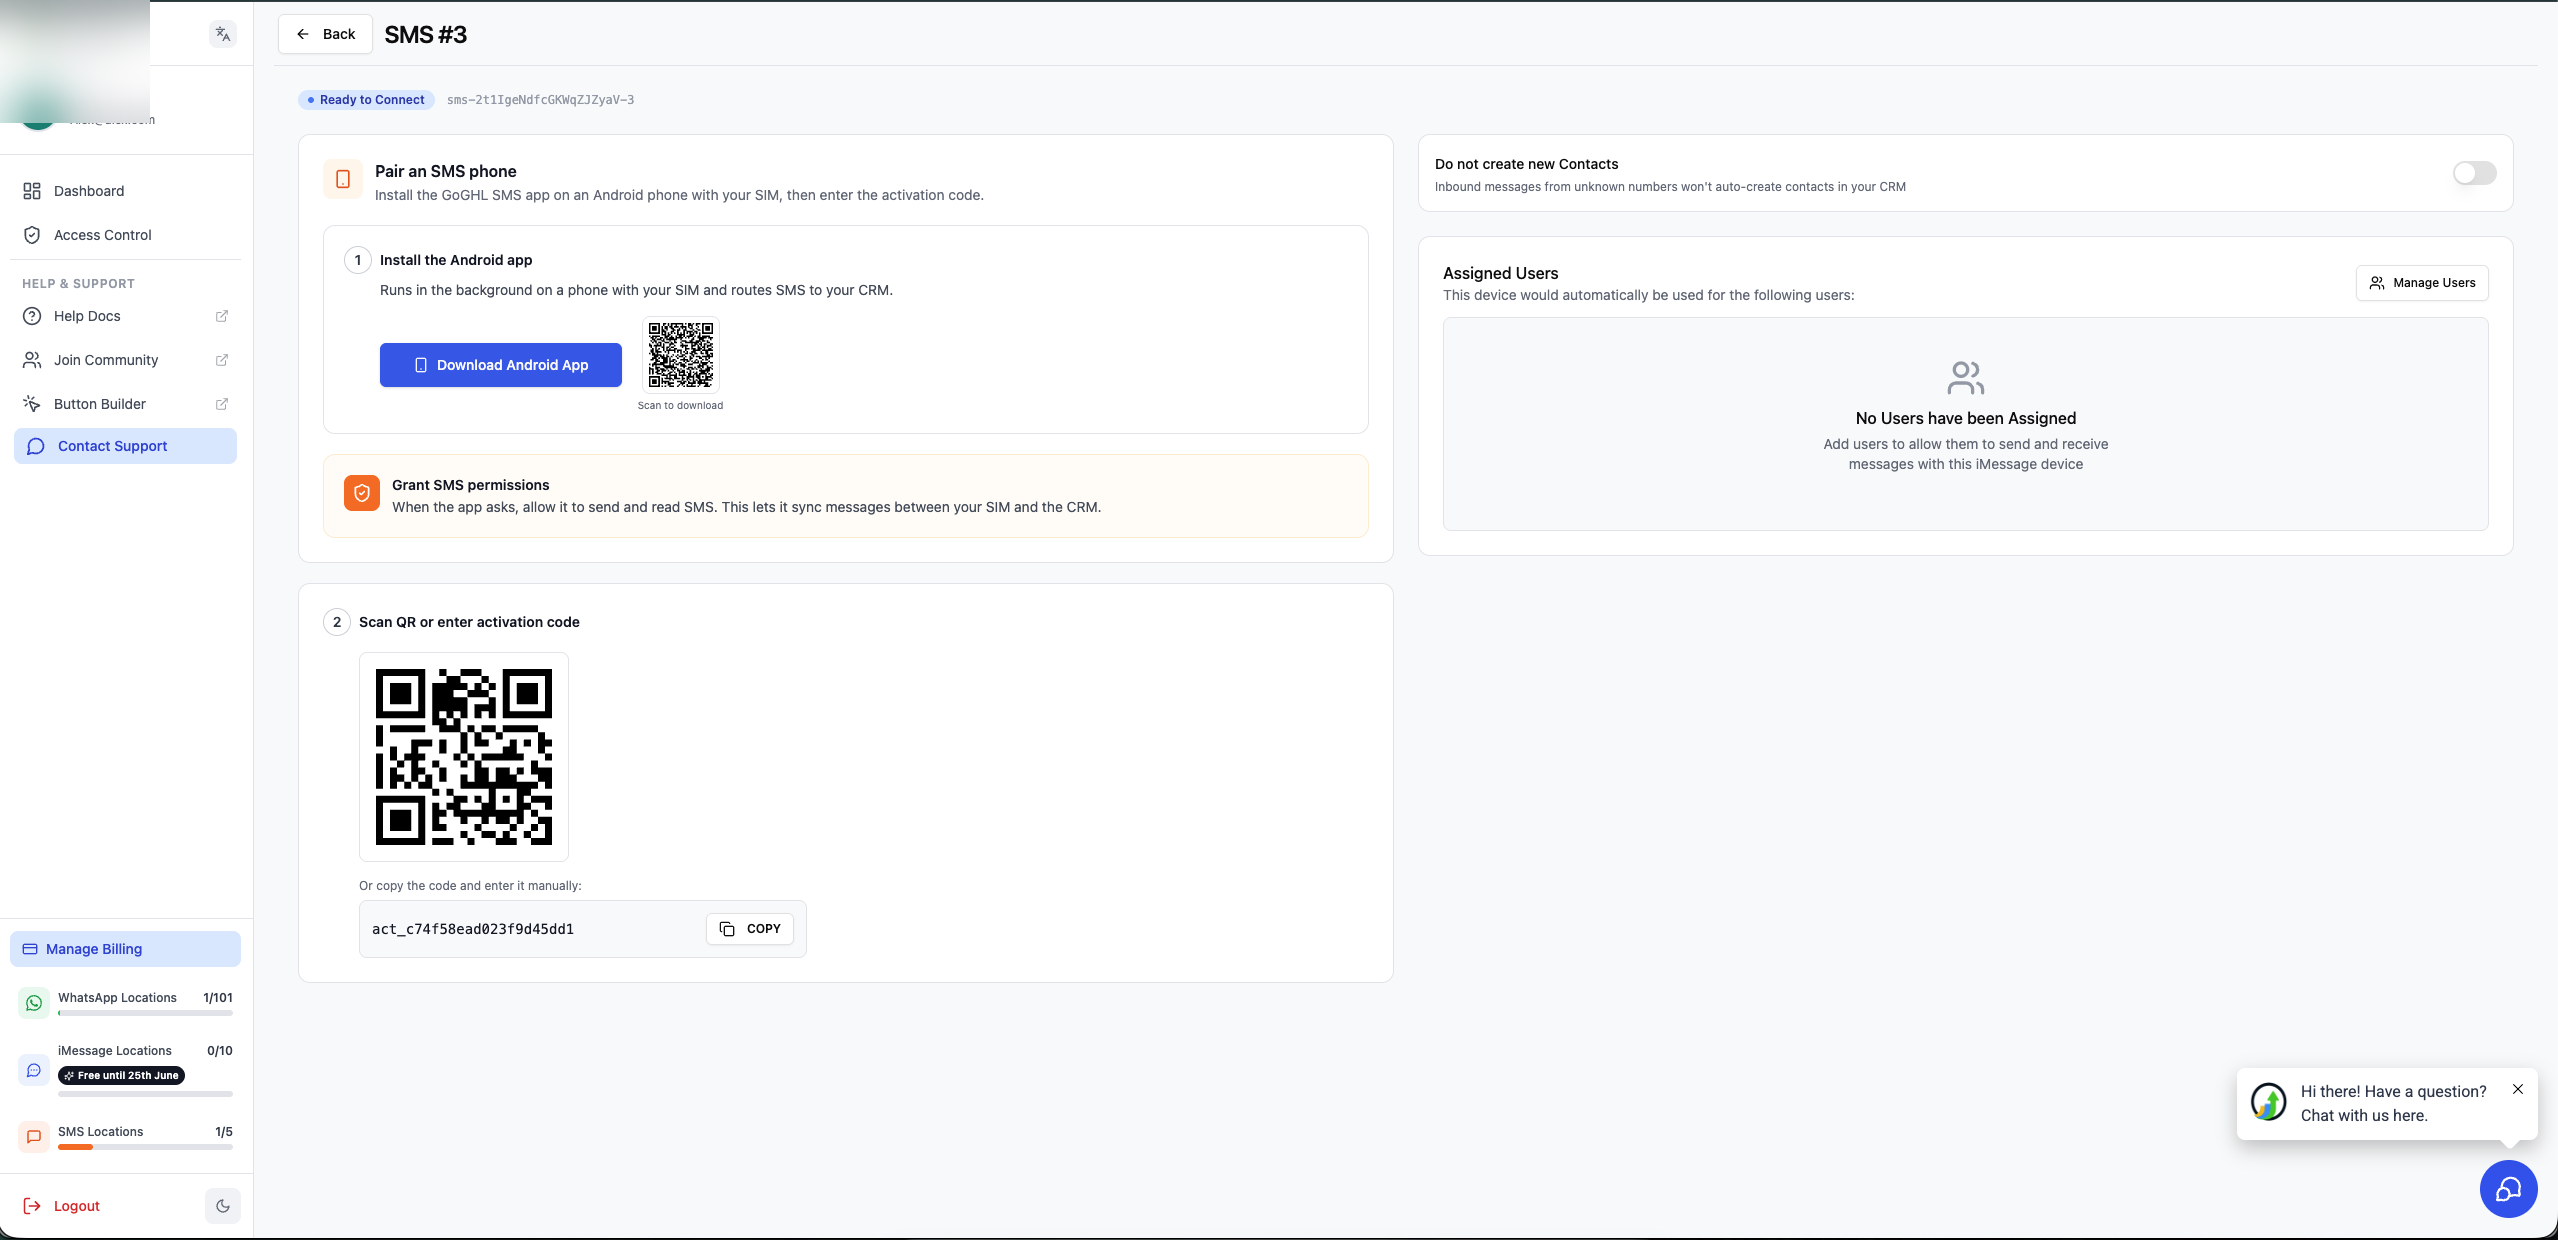
Step 5: Install and Connect the Android App
Open the device page in your dashboard. From here you'll download the Android app and grab the QR / activation code used to pair your phone in Part 2.
Part 2: Set Up the SMS Sync App on Android
Now we'll install the app on your phone. It acts as the bridge between your SIM and your CRM.
Step 1: Disable Play Protect (Important)
Google Play Protect can block the app from installing or running correctly, so turn it off first.
- Open the Google Play Store.
- Tap your profile icon (top right) → Play Protect.
- Tap the settings gear and turn off all Play Protect scanning.
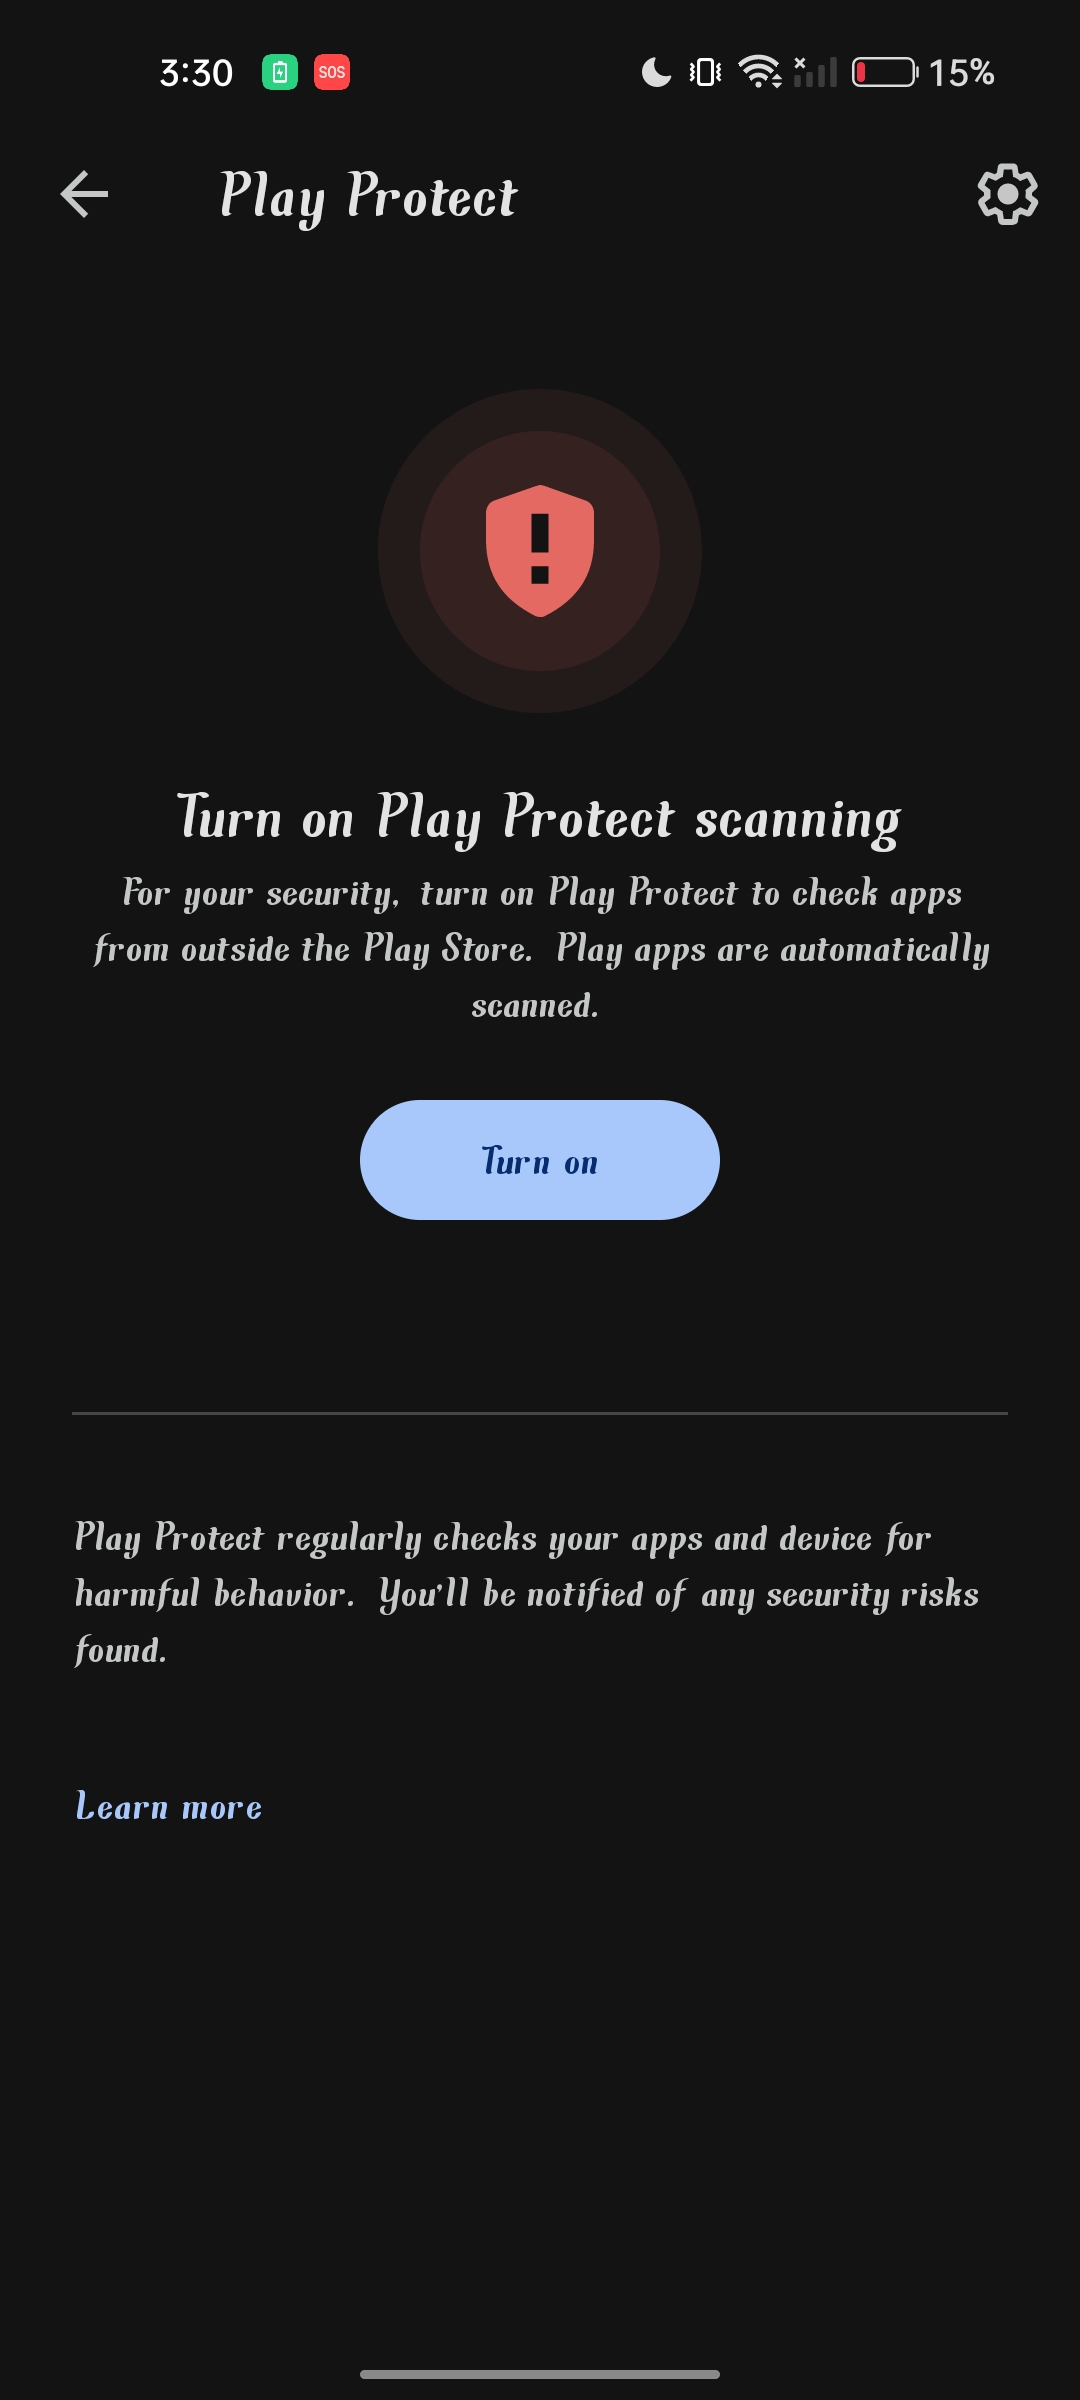
Always keep Play Protect off when installing or updating the SMS Sync app.
Step 2: Download & Install the App
-
Open Chrome on your Android phone.
-
From your dashboard's device page, tap Download Android App to download the APK file (allow the download if prompted).
-
Open the downloaded file from Files → Downloads, tap the APK, then tap Install.
Step 3: Allow All Permissions
When you open the app, it asks for the permissions it needs to send, receive, and relay messages. Tap Allow for every request.
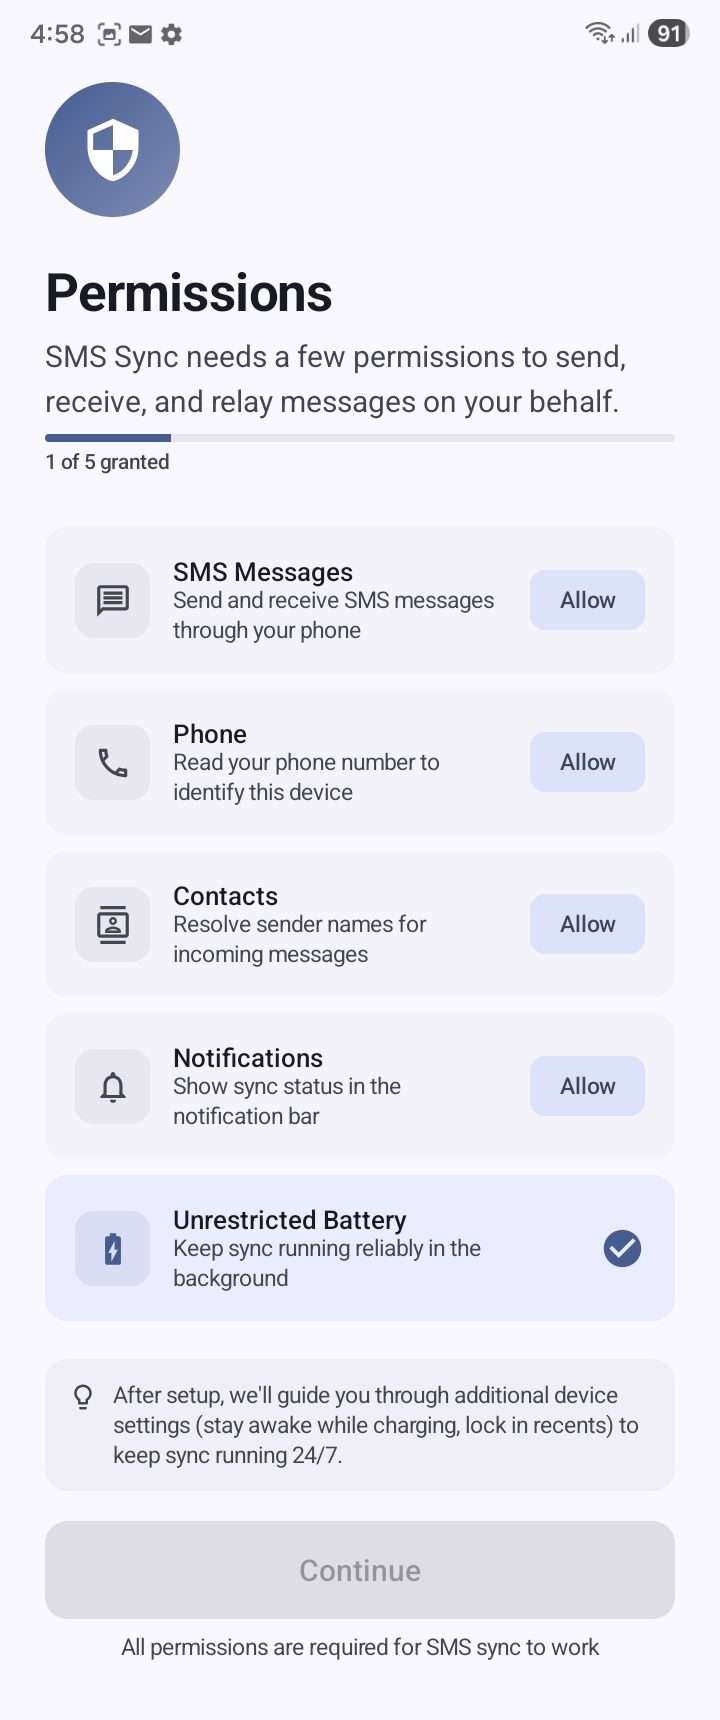
The app needs all five:
- SMS Messages: send and receive texts through your phone
- Phone: read your number to identify this device
- Contacts: resolve sender names for incoming messages
- Notifications: show sync status in the notification bar
- Unrestricted Battery: keep sync running reliably in the background
The app must be allowed to run in the background at all times. Without unrestricted battery and background activity, messages will stop syncing when the screen is off.
If a permission is greyed out, go to Settings → Apps → SMS Sync → ⋮ (3 dots) → Allow Restricted Settings, then grant it. Also turn off "Pause app activity if unused" so the app never gets suspended.
Step 4: Link the Device
On the Link Device screen, connect the app to your CRM with an activation code.
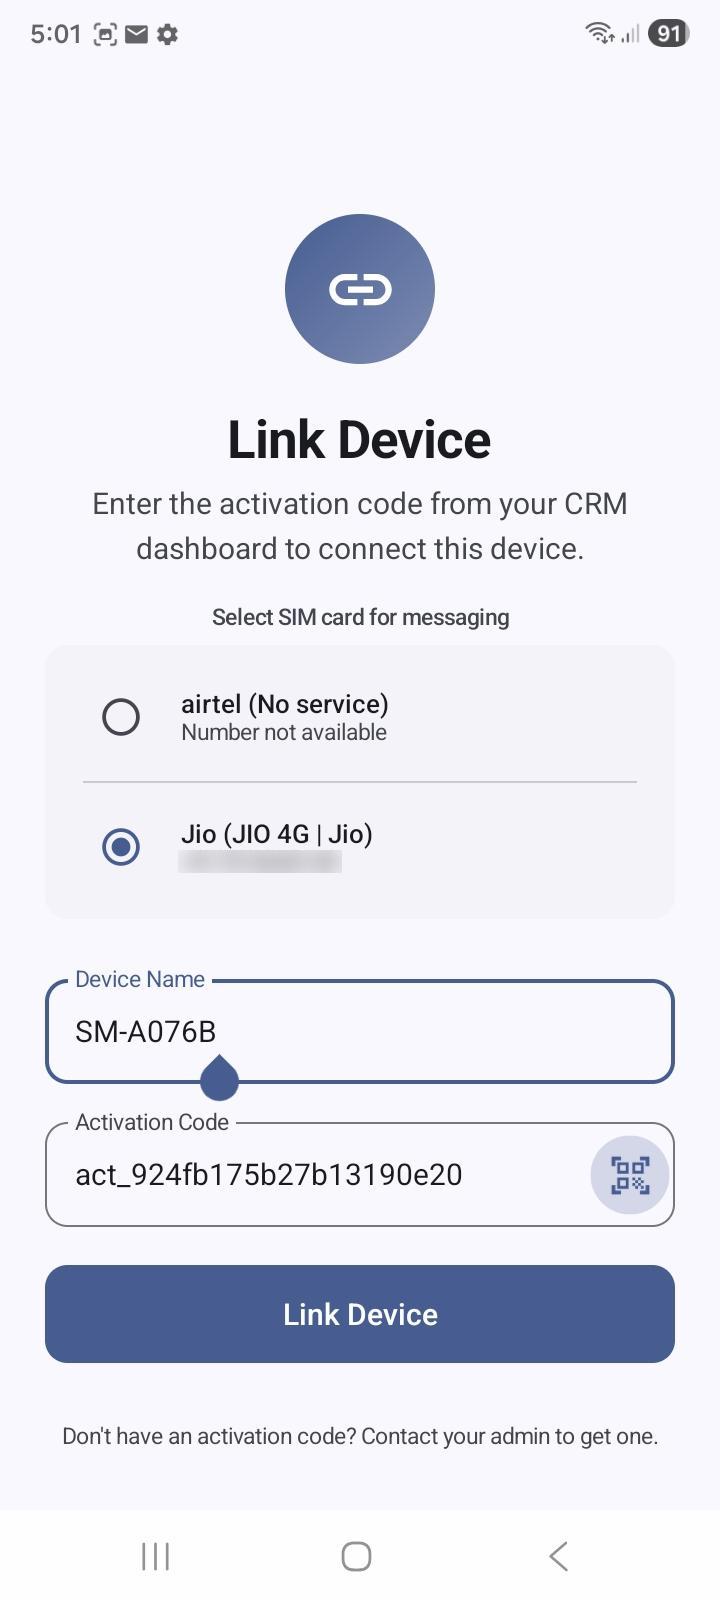
- Select the SIM card you want to use for messaging (important on dual-SIM phones, pick the SIM with an active number).
- Give the device a Device Name (e.g. your phone model) so you can recognise it in the dashboard.
- In your CRM dashboard, copy your Activation Code and paste it into the app, or tap the QR icon to scan it instead.
- Tap Link Device.
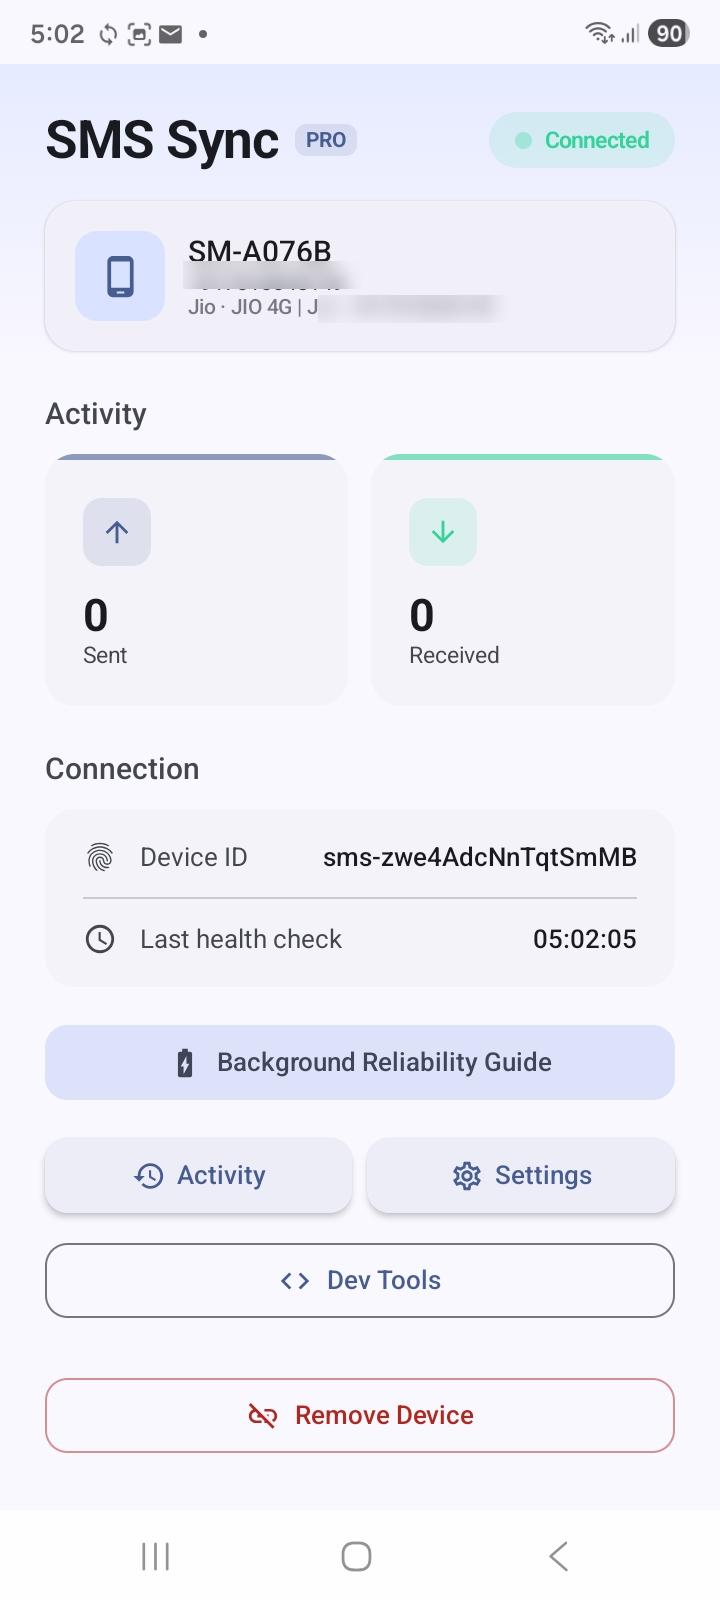
Step 5: Confirm It's Connected
Once linked, the app shows a Connected status with your device name, number, and live Sent / Received activity counters.
Part 3: Send a Test Message
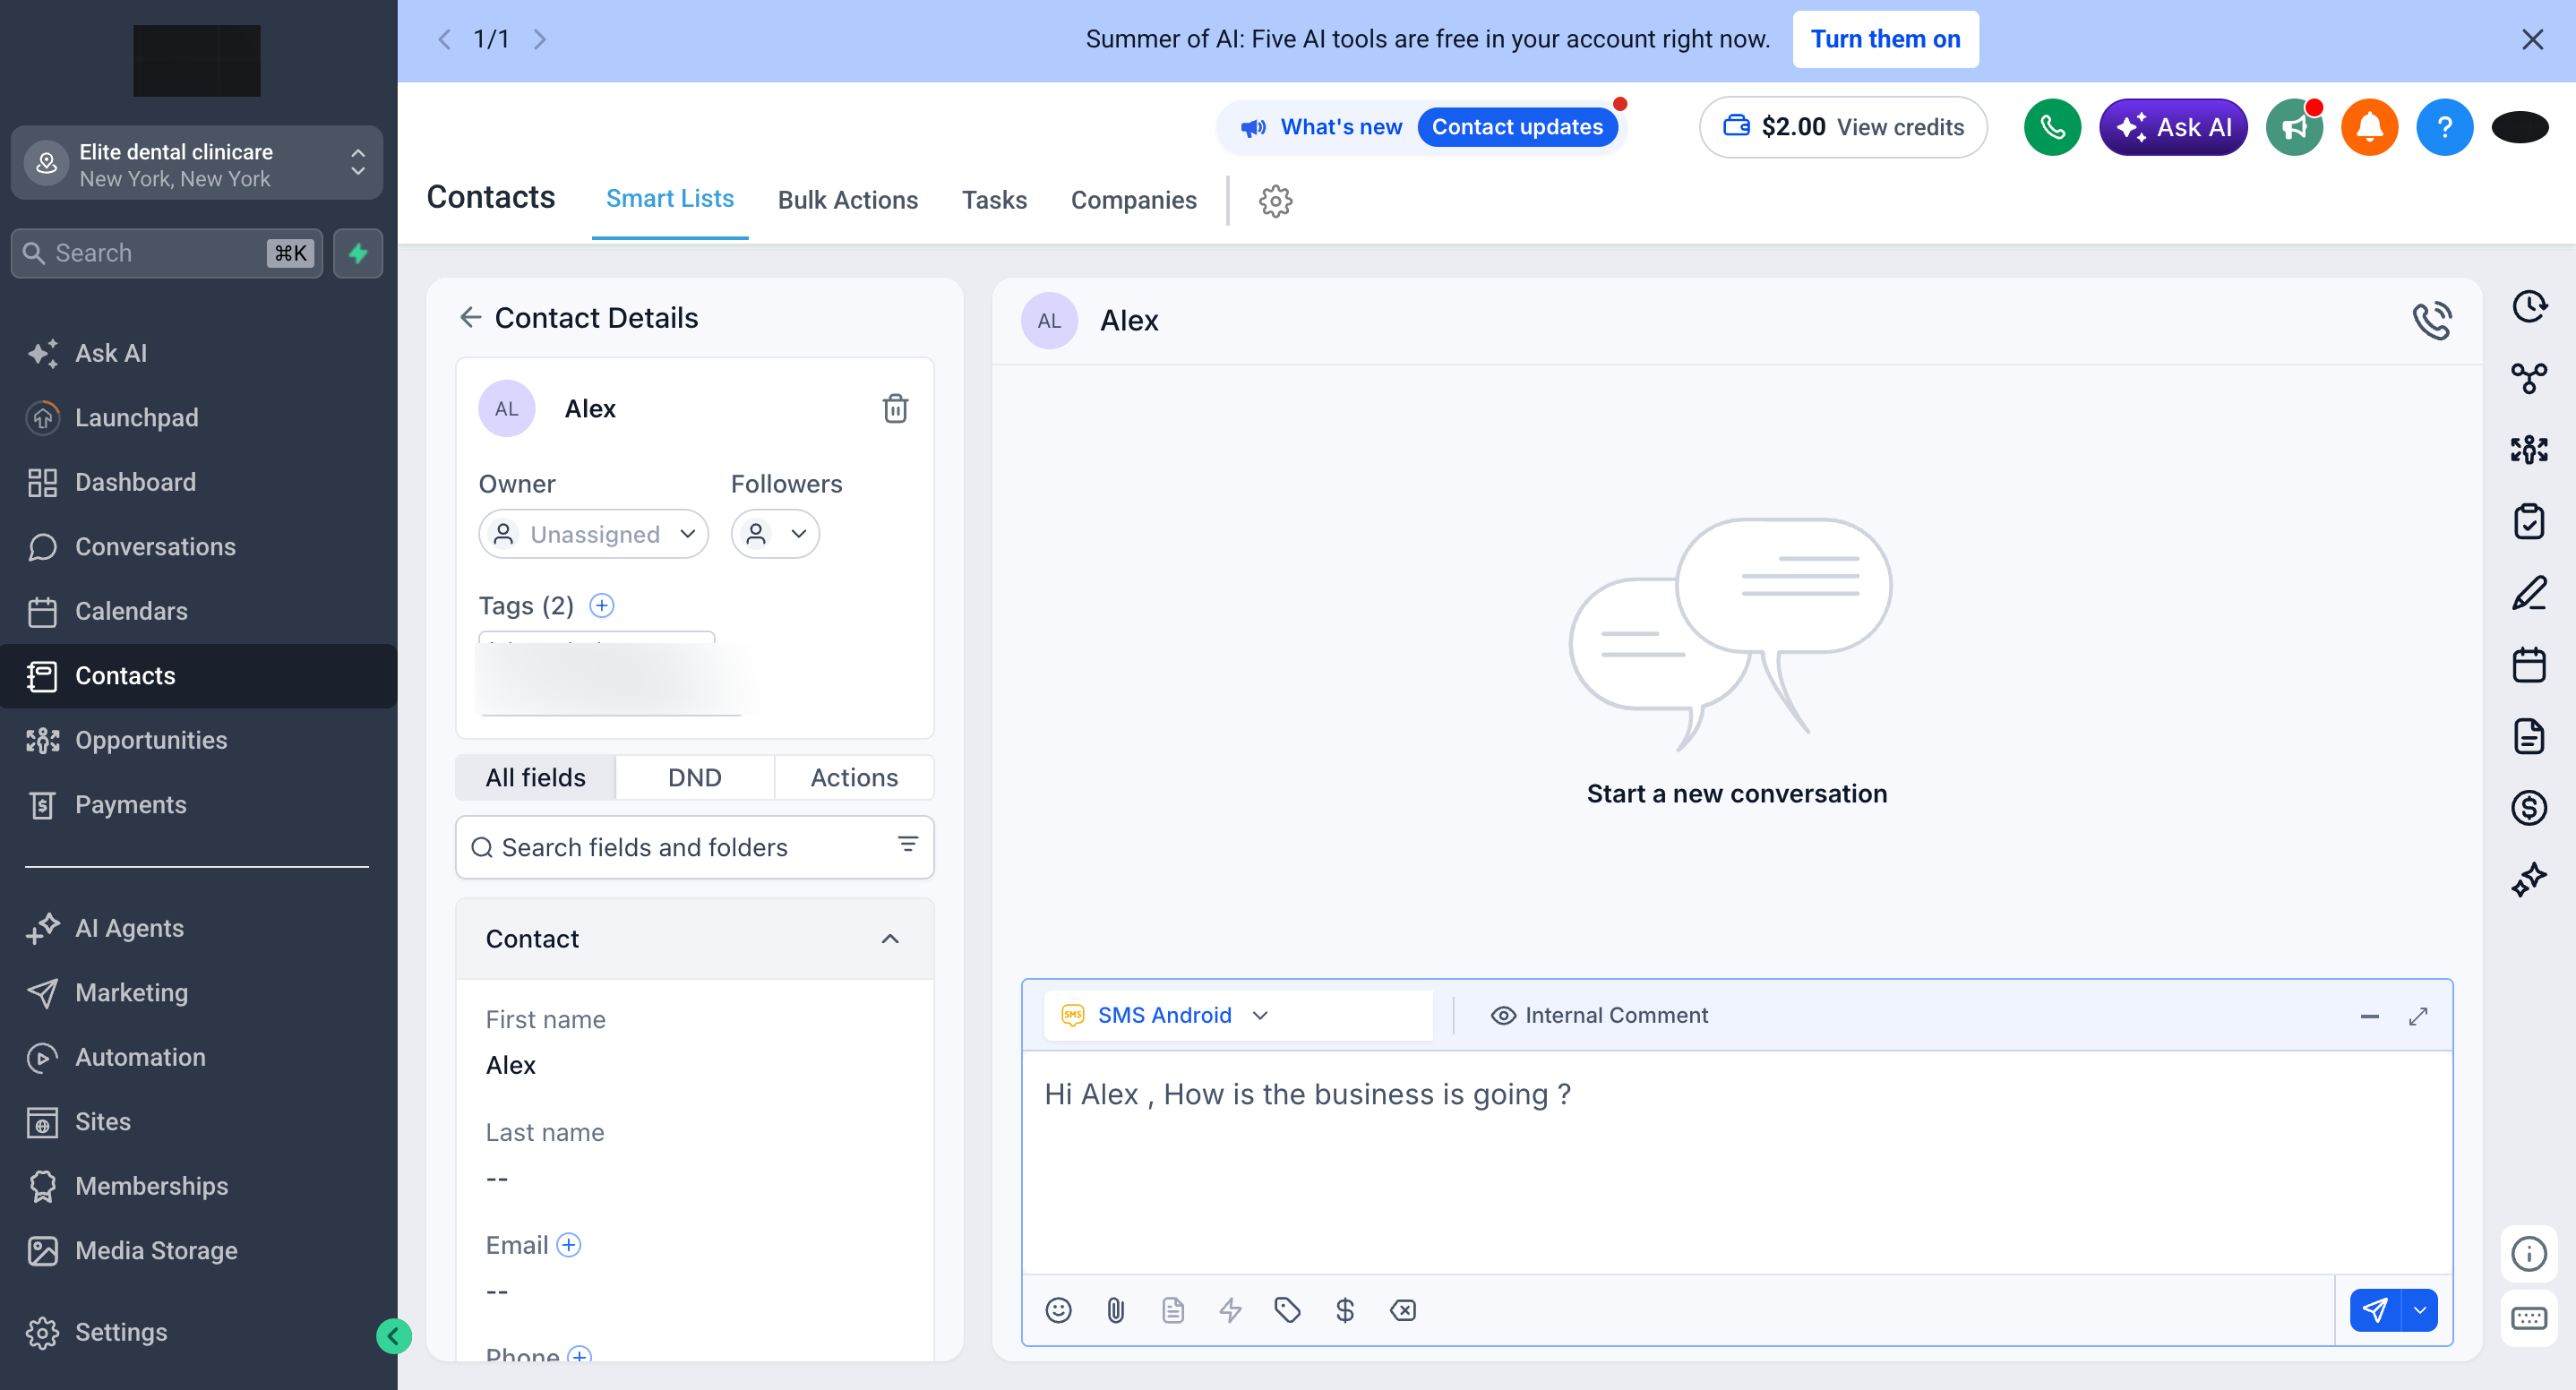
Let's confirm everything works end-to-end.
- Open any contact inside CRM and go to the Conversations tab.
- Choose SMS Android from the message-type dropdown.
- Type a quick test message and hit Send.
- Confirm the message sends successfully and the reply is received, both should appear in CRM, and the counters in the app should tick up.
Final Checklist
Keep your gateway running reliably:
- ✅ Keep Alive in Background is ON
- ✅ Sync Received is ON
- ✅ Phone stays plugged into power
- ✅ App is not battery-optimised or "paused when unused"
- ✅ Correct SIM selected (dual-SIM phones)
- ✅ Use the app for all messaging, not your native SMS app
Troubleshooting
If messages aren't sending, work through these in order:
| Symptom | Fix |
|---|---|
| App won't install / keeps closing | Play Protect is ON → turn it off |
| Messages stuck / not sending | A permission is missing → Allow all |
| Syncing stops when screen is off | App is being paused → disable pause & enable unrestricted battery |
| Replies not reaching CRM | App isn't the default SMS app → set it |
| Nothing routes at all | Device not assigned to sub-account, or SMS routing not enabled in the dashboard |
Dashboard Monitoring
In your dashboard, check the device's status (Active), battery level, connection (Wi-Fi/Mobile), permissions status, and last ping. Errors here usually point straight to the setup issue.
🎉 Start texting! Your Android phone is now a fully connected SMS gateway for your CRM.