

Key Benefits
Instant Response - React the moment a customer’s message lands Smart Routing - Direct conversations to the right rep or team Never Miss a Lead - Automate follow-up so no inbound message goes cold Filtered Automation - Trigger only on messages that match your criteria Zero Manual Monitoring - No need to watch the inbox around the clockWho Should Use It
Sales teams - Auto-respond and assign new conversations instantly Support teams - Acknowledge inbound messages and create tickets automatically Agencies - Standardize inbound message handling across client sub-accounts High-volume operations - Keep response times fast even at scaleRequirements
Before using this trigger, update your Whatsapp provider app to the latest version:1
Go to App Marketplace → Installed Apps
2
Find Whatsapp provider
3
Click Update if available
How to Set Up
Step 1: Create a New Workflow
1
Go to Automation → Workflows
2
Click Create Workflow or + Add
3
Select Start from Scratch
Step 2: Add the Trigger
1
Click Add New Trigger
2
Switch to the Apps tab (not the default triggers)
3
Find and click the Whatsapp provider app icon
4
Select WhatsApp Inbound from the dropdown
5
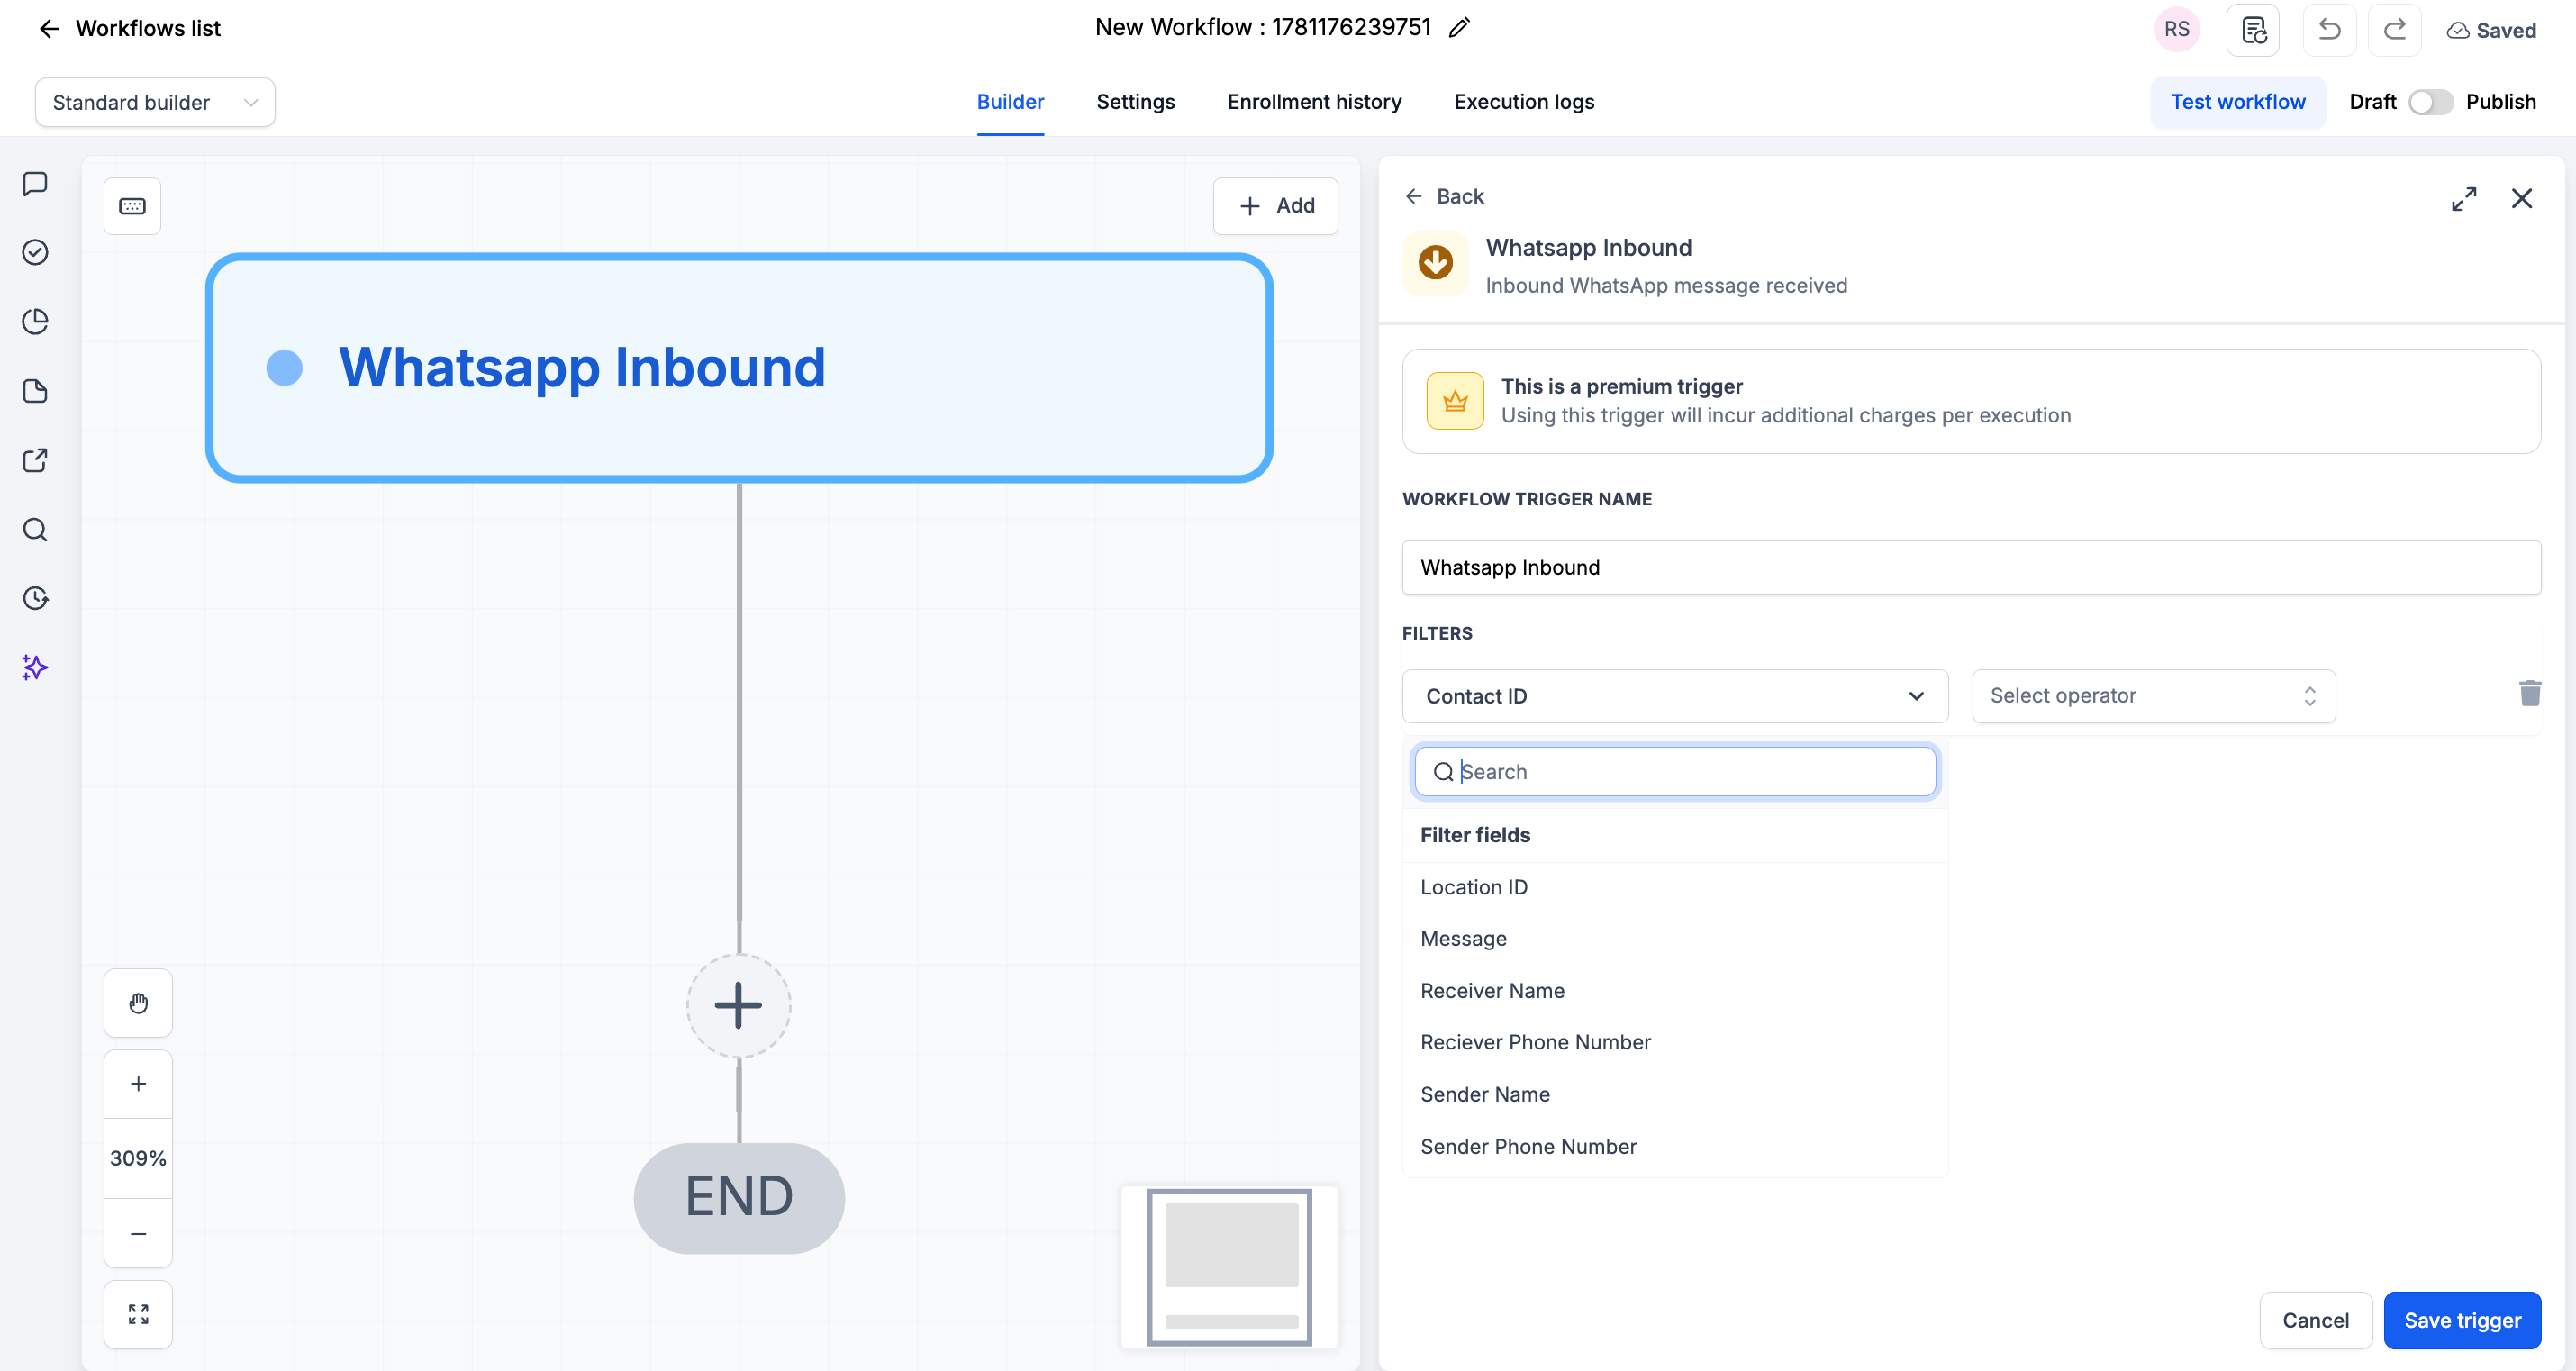
(Optional) Add Filters to narrow when the trigger fires
6
Click Save trigger
Step 3: Add Your Actions
Add any actions you want to execute when an inbound WhatsApp message is received:- Send Email → Notify the assigned rep
- Send Internal Notification → Alert your team inside the CRM
- Create Task → Queue a follow-up
- Add to Workflow / Pipeline → Move the contact through your funnel
Step 4: Save and Publish
1
Review your workflow
2
Click Save
3
Toggle workflow from Draft to Published
Available Filters
Use filters to control exactly which inbound WhatsApp messages start the workflow. Each filter can be paired with an operator (equals, contains, etc.).Example Use Cases
Use Case 1: Instant Auto-Reply
Acknowledge every inbound message immediately. Trigger: WhatsApp Inbound Action: Send a reply confirming you received the message and will respond shortly.Use Case 2: Route by Keyword
Send leads to the right team based on what they say. Trigger: WhatsApp Inbound Filter: Message contains “pricing” Action: Notify the sales team and create a high-priority follow-up task.Important Notes
Technical Details
- The trigger fires once per inbound message
- Filters are optional - leave them blank to fire on every inbound WhatsApp message
- Executes immediately when the message is received
Best Practices
- Use the Message filter to build keyword-based routing flows
- Use the Location ID filter when managing multiple sub-accounts
- Test your workflow by sending a message to your connected number
FAQs
Do I have to add filters?
Do I have to add filters?
No. Filters are optional. Without them, the trigger fires on every inbound WhatsApp message.
Can I trigger different workflows for different messages?
Can I trigger different workflows for different messages?
Yes. Use the Message or Sender filters to build separate workflows for different conditions.
Support
If you need help with the setup or onboarding:- WhatsApp Support: Chat on WhatsApp
- Email: support@goghl.ai